What To Know About Building a Recording Studio at Home
Building a home studio offers creative freedom, technical control, and long-term value for artists who demand professional sound quality. A private space within your residence can support vocal work, instrument capture, podcast production, and post-production tasks without rental fees. With careful preparation, you can shape an environment that supports artistic focus and consistent output.
A successful studio requires thoughtful design, reliable equipment, and attention to detail across structure, layout, and sound control. Every choice, from room size to wall material, affects clarity, balance, and comfort. When you understand the core principles of building a recording studio at home, you can avoid costly errors and create a space that serves your goals for years.
Define Your Studio Vision
A clear vision shapes every decision and helps you define goals for sound quality and room function within your home. You must decide whether the studio will support music production, voice work, podcasts, or multimedia projects. Each purpose requires different equipment, layout choices, and acoustic control methods for best results.
Budget limits also affect the scope of your project and influence material selection and equipment range. A realistic cost outline prevents stress and supports steady progress across each project phase. Clear financial expectations allow you to prioritize structural needs before aesthetic upgrades or luxury features.
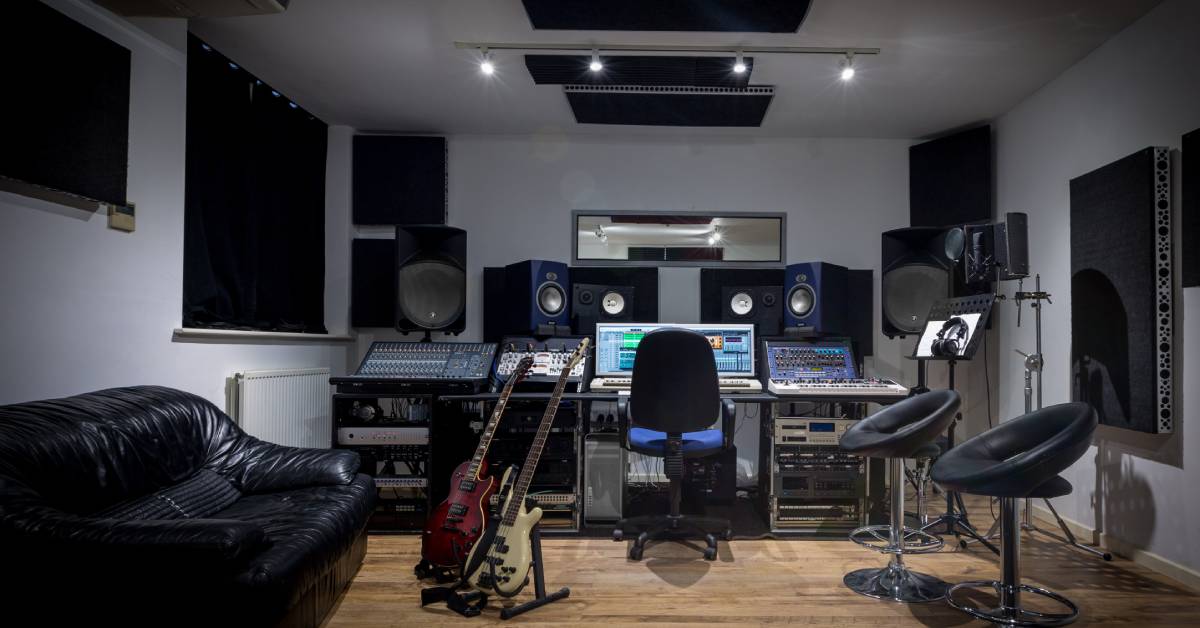
Select the Ideal Room
Room choice affects sound balance, isolation, and comfort more than any single equipment purchase within your project plan. A rectangular room with balanced proportions often produces a more predictable acoustic response across low and mid frequencies. Avoid small square rooms because they create uneven bass response and reduce clarity.
Consider room location within the house to limit outside noise from traffic, neighbors, or shared walls. Spaces far from kitchens, laundry areas, and street-facing walls often provide quieter conditions for sensitive microphones. Adequate space also allows safe cable routes and comfortable placement for speakers, desk, and seating.
Understand Acoustic Control
Sound behavior within a room depends on surface material, dimensions, and object placement throughout the space. Hard surfaces reflect sound waves, while soft materials absorb energy and reduce echo. Balanced control requires both absorption panels and diffusion elements placed with care.
Bass frequencies require special attention because they build up in corners and along flat boundaries. Bass traps placed in room corners help smooth low-frequency response and improve clarity. Wall panels at first reflection points also reduce harsh echoes and improve stereo image accuracy.
Plan Structural Isolation
Isolation prevents outside noise from entering your studio and keeps internal sound from disturbing others. Wall density, door seals, and window design all affect how much sound escapes or enters. Solid core doors and double-layer drywall often improve isolation without extreme cost.
If you plan a new residence, learning the factors of building a custom home is the best solution because it allows you to tailor each room for sound. Dedicated walls with insulation and staggered studs reduce vibration transfer between rooms. Separate electrical circuits also limit hum and protect sensitive audio equipment.
Design an Efficient Layout
Studio layout affects workflow, comfort, and sound accuracy across every session. Place speakers at ear level and form an equilateral triangle with your listening position. This arrangement supports balanced stereo perception and accurate mix decisions.
Keep your desk centered on the front wall to maintain symmetry across the room. Equipment racks should remain within easy reach without blocking speaker paths or airflow. Clear cable paths reduce clutter and support safe movement across the studio floor.
Choose Quality Equipment
Microphones, audio interfaces, and speakers form the technical core of your studio setup. Select gear that matches your goals rather than chasing brand reputation alone. Transparent sound and reliable performance should guide every purchase decision.
Invest first in accurate speakers because they shape every recording and mix judgment. A solid audio interface with clean preamps ensures detailed signal capture from microphones and instruments. Durable cables and stable stands also protect sound quality and reduce technical faults.
Address Power and Safety
To create a reliable home recording studio, you need electrical service that protects equipment and reduces unwanted noise within audio signals. Dedicated circuits prevent overload and reduce interference from appliances in other rooms. Surge protection devices guard against voltage spikes that could damage sensitive components.
Proper ventilation maintains safe temperatures for computers, amplifiers, and outboard gear during long sessions. Overheated equipment may fail and interrupt important projects without warning. Fire safety measures such as smoke detectors and accessible extinguishers add peace of mind.
Focus on Comfort and Ergonomics
A well-designed studio must support physical health and mental clarity during long creative sessions. Comfort affects focus, posture, and overall productivity within your home studio. Thoughtful ergonomic choices help prevent fatigue and support consistent performance.
- Select a supportive chair: Choose an adjustable chair with firm lumbar support and stable armrests for proper spine alignment.
- Set proper desk height: Ensure desk height allows relaxed shoulders and natural wrist position while you operate keyboards and control surfaces.
- Position monitors correctly: Place screens at eye level to reduce neck strain and maintain healthy posture during extended work periods.
- Arrange speakers with care: Keep studio monitors at ear level and angled toward your listening position for accurate sound and comfort.
- Use balanced lighting: Install soft, indirect lighting that reduces glare on screens and limits eye strain.
- Control room temperature: Maintain steady airflow and moderate temperature to protect equipment and support personal comfort.
Plan for Future Expansion
Your needs may evolve as skills grow and new projects appear across your career path. Extra space for additional equipment racks can prevent costly redesign later. Flexible wall panel placement allows acoustic adjustments as your setup changes.
Consider cable conduits within walls to support future upgrades without major renovation work. Additional power outlets along each wall reduce reliance on extension cords. A scalable plan protects your investment and keeps your studio relevant for many years.
Test and Refine the Space
After setup, careful testing reveals strengths and weaknesses within your acoustic environment. Reference tracks with known sound profiles help you evaluate balance and clarity. Small adjustments to speaker position often produce noticeable improvement.
Room measurement software can provide data that supports objective acoustic refinement decisions. Adjust panel placement and bass trap location based on measured frequency response patterns. Regular evaluation ensures your studio continues to deliver accurate and reliable results.
A home studio represents more than a technical project; it reflects commitment to craft, discipline, and long-term artistic growth. Each structural choice, equipment purchase, and layout decision shapes the sound you produce and the experience you enjoy. With thoughtful preparation and steady effort, you can create a professional environment that supports clear audio and creative freedom within your own home.
Share this content:


Post Comment